Handyman Services in Perrysburg Ohio
Handyman Services in Perrysburg Ohio
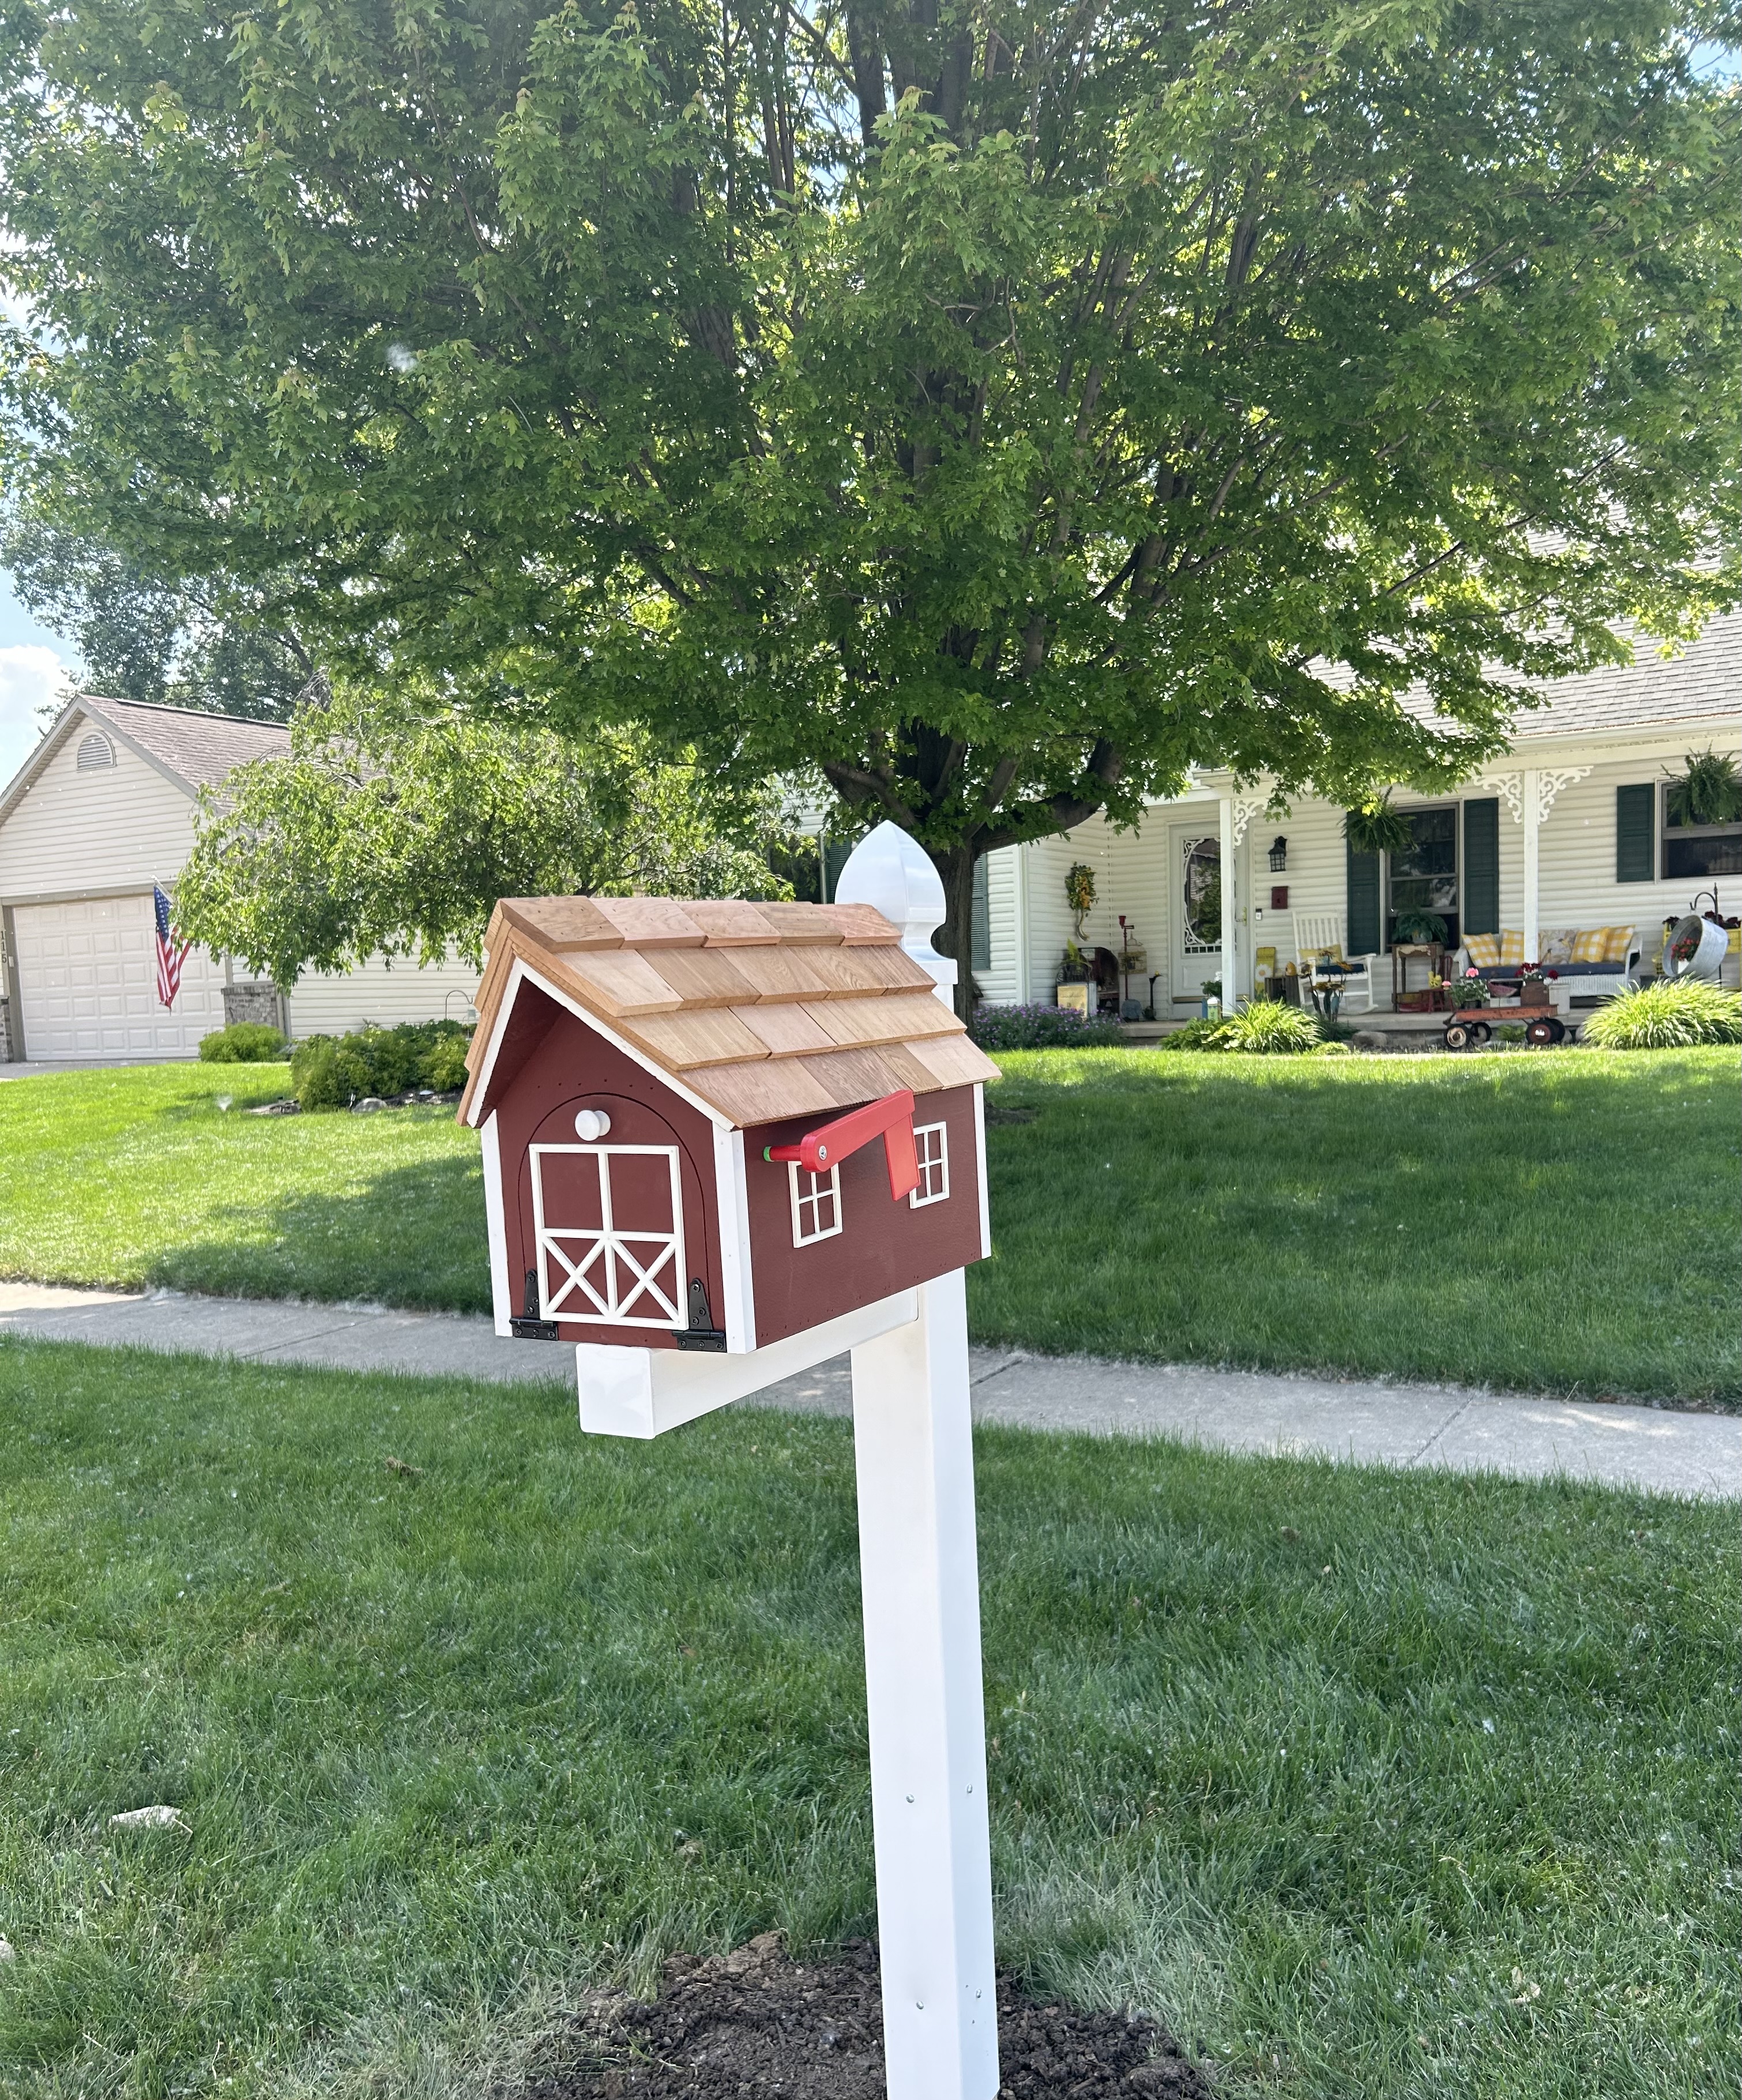
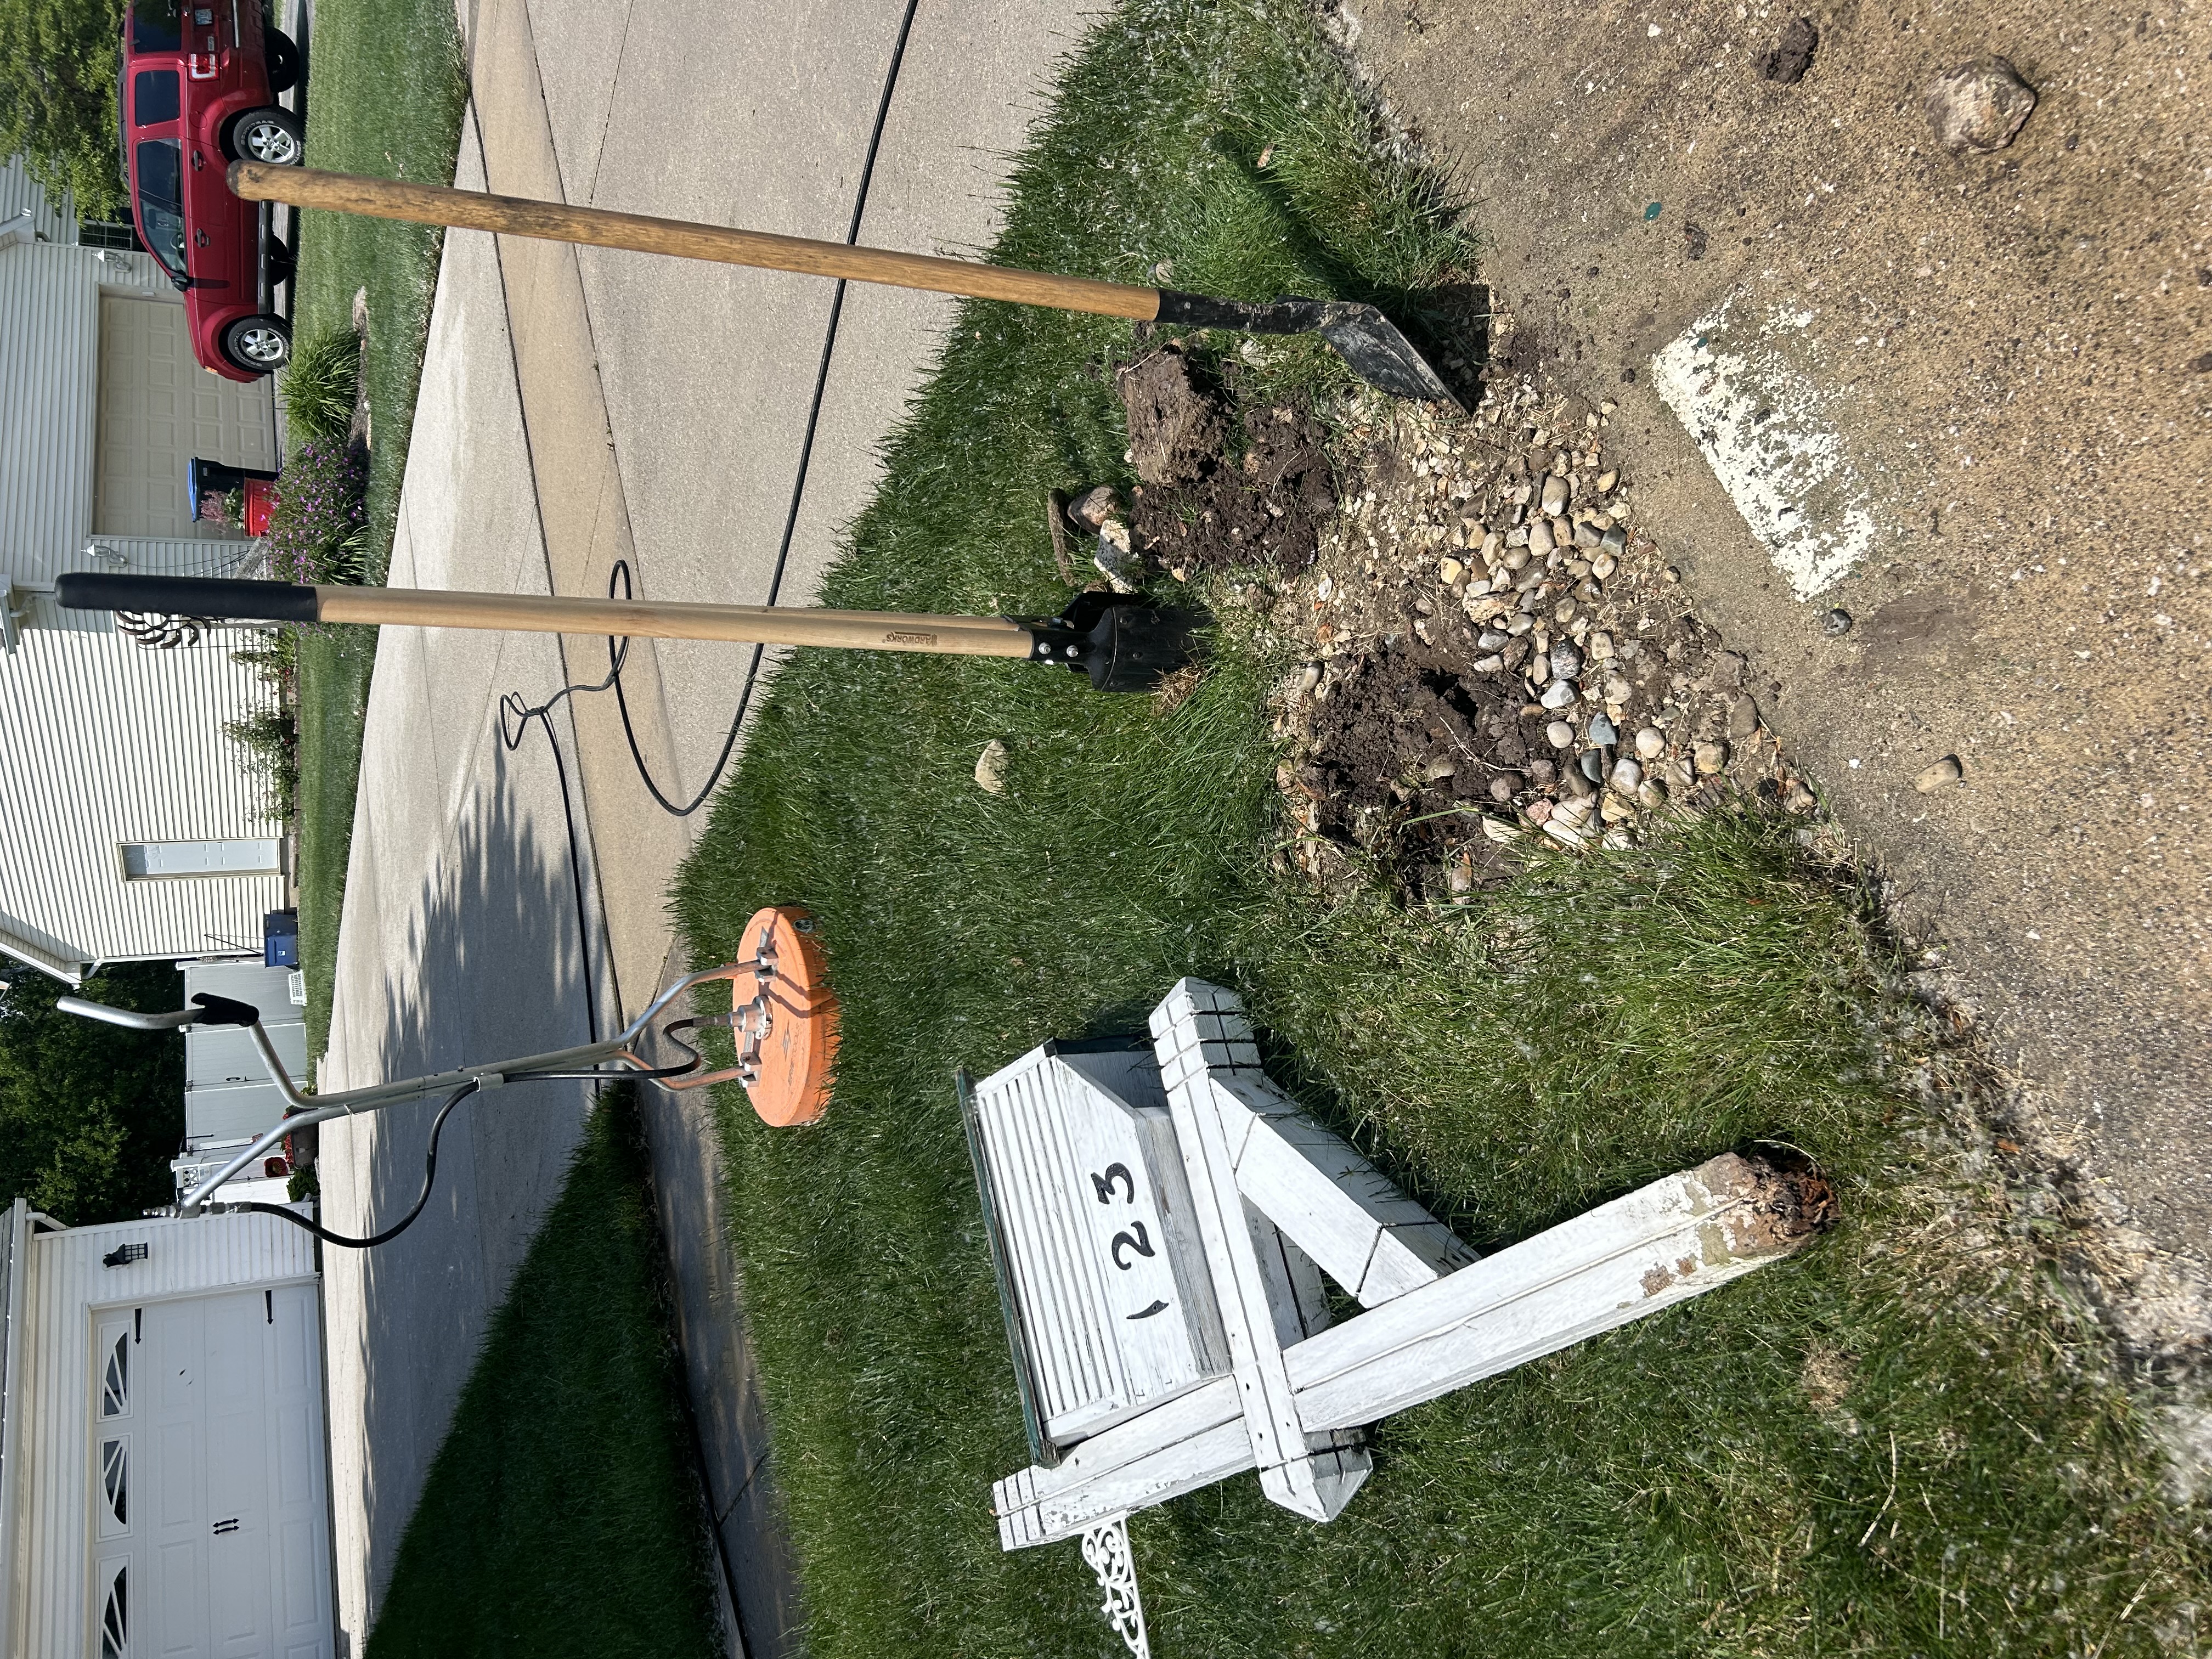
Customer requested to have old mailbox removed and new one installed.
Installing a mailbox is a straightforward task, but it requires attention to detail to ensure it meets local regulations and functions correctly. Here's a comprehensive guide to help you install your mailbox with precision and confidence:
Materials and Tools Needed:
Mailbox
Post (if installing a new post-mounted mailbox)
Post hole digger or shovel
Concrete mix
Level
Tape measure
Screws and screwdriver or drill
Gravel (optional, for drainage)
Step-by-Step Guide:
1. Check Local Regulations:
Before starting, consult your local post office or municipal regulations to understand the specific requirements for mailbox height, placement, and distance from the curb or road. Compliance with these regulations ensures that your mailbox will be accessible and meet postal standards.
2. Determine Location:
The typical height for a mailbox is between 41 to 45 inches from the road surface to the bottom of the mailbox. The mailbox should be set back 6 to 8 inches from the curb. If there is no curb, consult your local guidelines.
3. Install the Post:
Dig the Hole: Using a post hole digger or shovel, dig a hole at least 24 inches deep to ensure stability. The diameter should be about 1/3 of the post width.
Prepare the Post: Place a few inches of gravel at the bottom of the hole to aid drainage.
Set the Post: Insert the post into the hole, ensuring it stands straight. Use a level to check its alignment.
Secure the Post: Pour concrete into the hole around the post, filling it to about 2 inches below ground level. Allow the concrete to set for 24 hours before proceeding.
4. Attach the Mailbox:
Mounting Bracket: If your mailbox requires a mounting bracket, attach it to the post using the screws provided.
Install the Mailbox: Place the mailbox on the bracket and secure it according to the manufacturer’s instructions. Ensure it is level and securely fastened.
5. Final Adjustments:
Double-check that the mailbox is level and positioned at the correct height and distance from the curb. Adjust if necessary before the concrete fully sets.
6. Finishing Touches:
Fill any gaps around the post with soil and tamp it down firmly. If desired, you can add decorative elements like mulch or plants around the base of the post.
Additional Considerations:
Weather Protection: Ensure the mailbox is weather-resistant to protect mail from rain and snow. Consider a mailbox with a built-in drainage hole or add one if necessary.
Security Features: If mail theft is a concern, opt for a locking mailbox.
Maintenance: Periodically check the mailbox and post for signs of wear or damage. Tighten screws and repaint the post as needed to maintain its appearance and functionality.
By following these steps meticulously, you can ensure that your mailbox is installed correctly, providing reliable mail service and enhancing the curb appeal of your property.
Location: Perrysburg, OH
Project Image Gallery
Clean Up Your Property With Our Toledo Pressure Washing Specialists! Contact Us Today!